Building the Framework
Begin by naming the phases your studio moves through.
Every practice is different. What matters here is accuracy — not conformity.
Inside your blank Asana project, create a section for each phase of your process.
To add a section, press Tab + N or click “Add Section” at the top of your list view.
It’s ok if some of your phases run concurrently (like procurement and documentation)
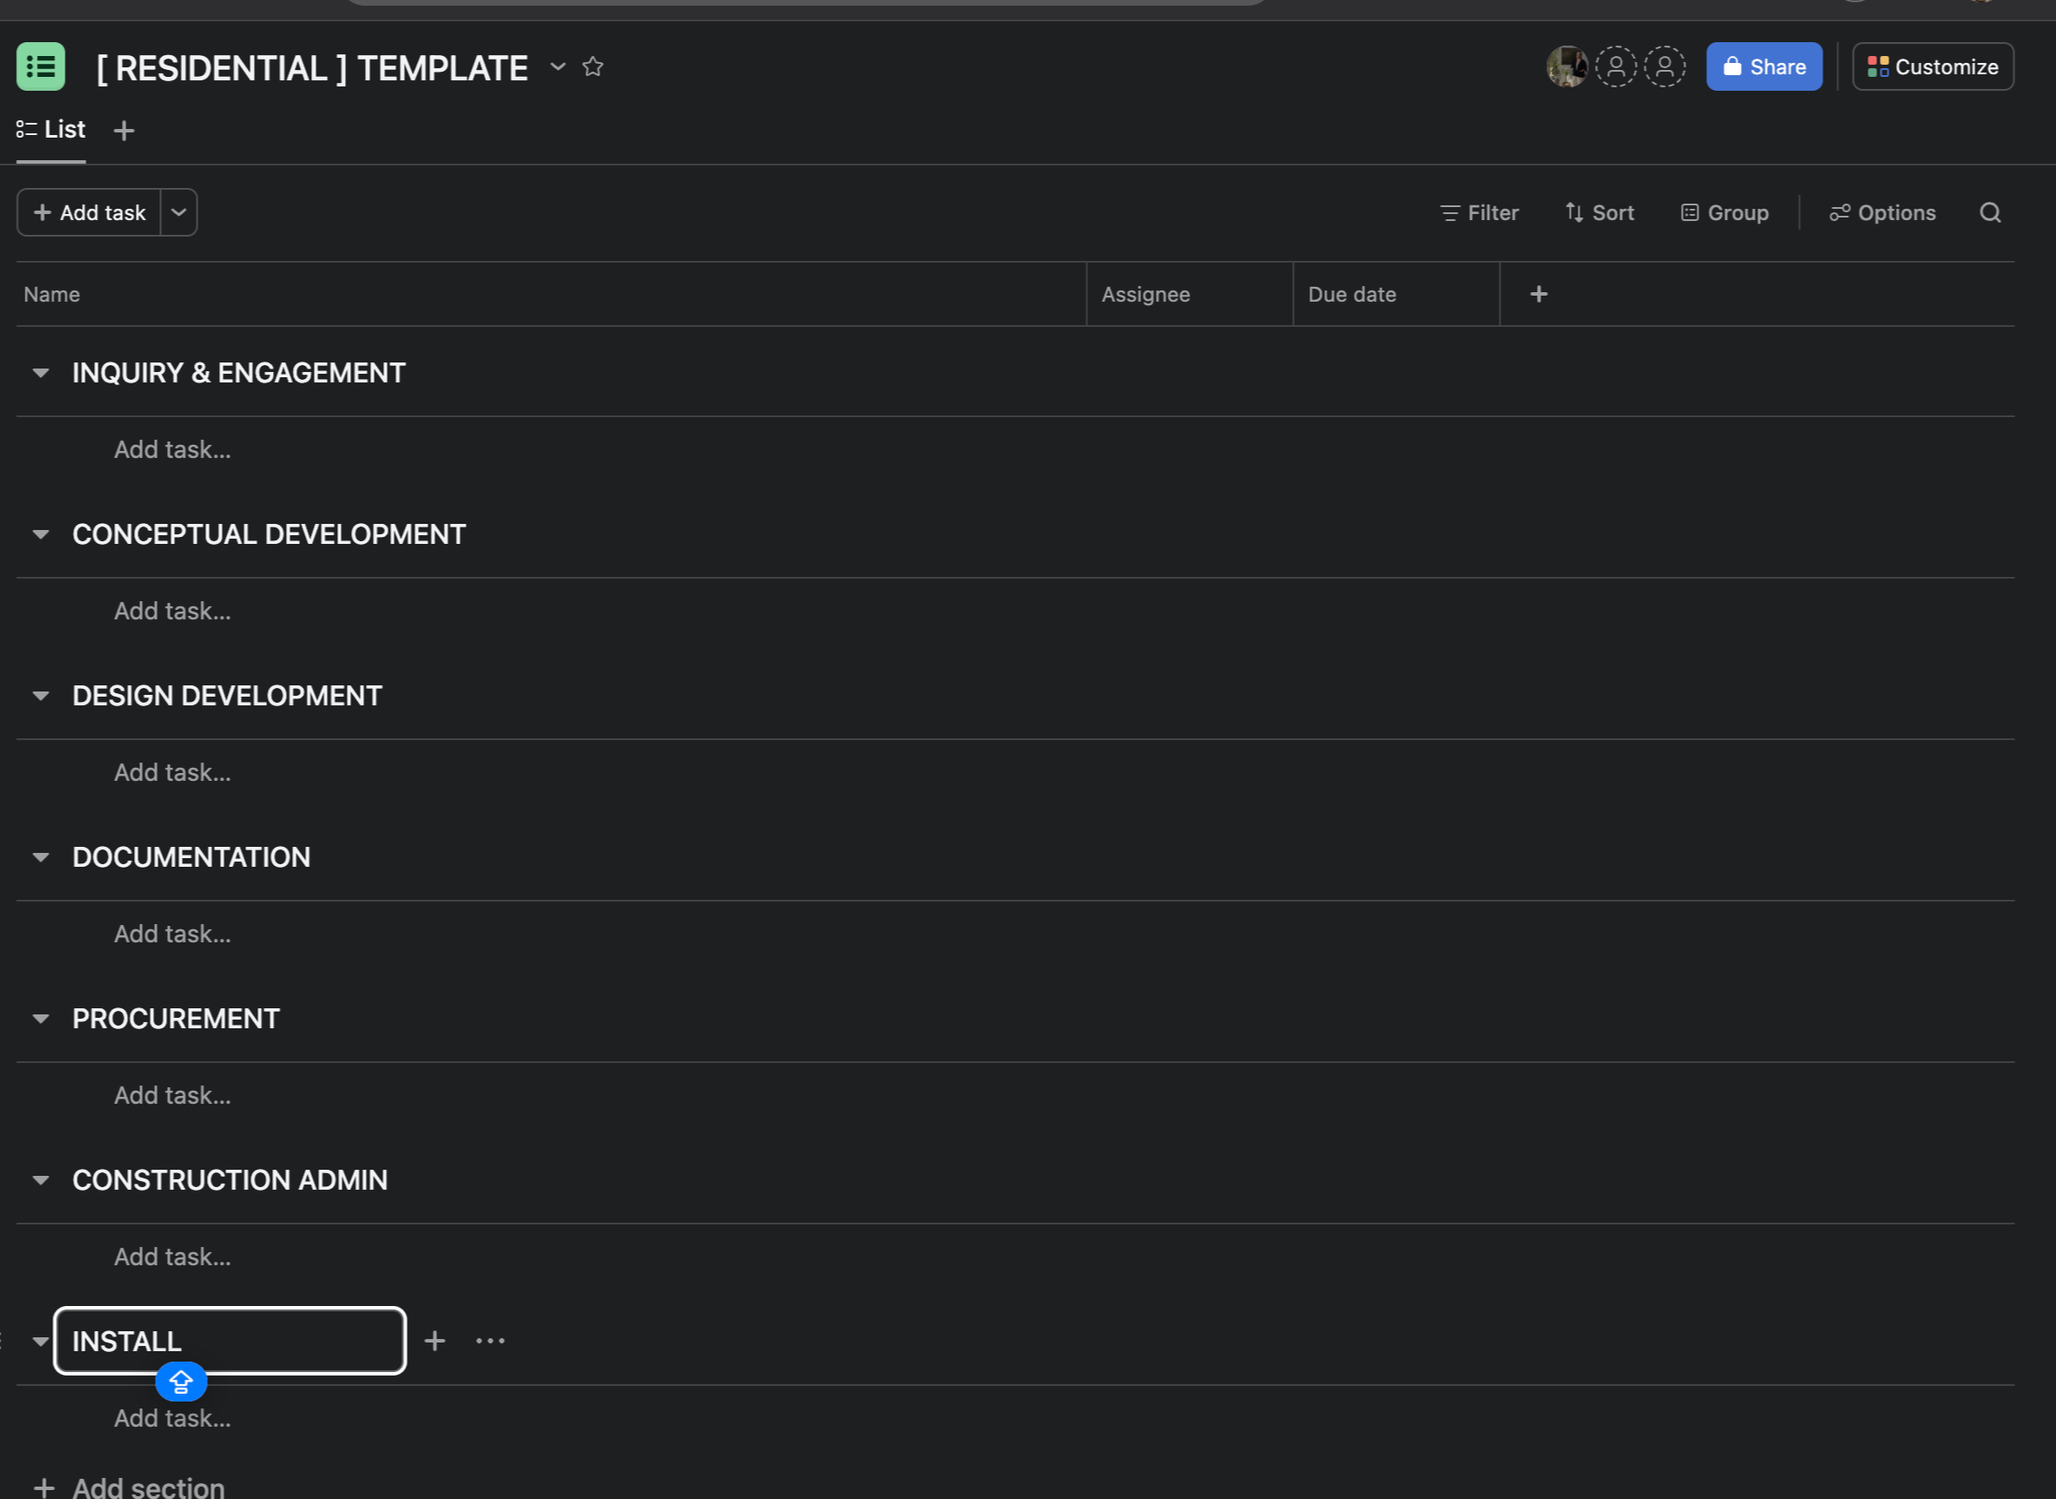
Use these eight phases as a starting point if you need one:
Inquiry & Engagement
Concept Development
Design Development
Procurement
Documentation
Construction Administration
Install
Wrap
These are not rules. They’re scaffolding.
Rename, remove, duplicate, or add phases to reflect the way your studio actually works.
If you separate IA from FF&E, add both.
If you operate with fewer phases, collapse them.
If your studio has additional phases, create them.
This can start simple, then expand as you become more familiar with the tool. Don’t overthink it for now - optimization comes later.
This step builds the foundation of your system — the structure the rest of the work will sit on.